
How to Repair Stucco That Has Cracks
How to repair the stucco? Just as with other materials, there are different ways to improve and keep the beauty of stucco. Let’s start with the basics.
Stucco Repair Tampa involves removing damaged portions of the exterior walls and repairing all existing holes and cracks. If you’ve never painted your exterior walls, or if your new stucco hasn’t been matched to your existing walling, or if you’ve just applied a fresh coat of paint, you can repair your stucco by repainting them. When repainting your exterior surfaces, it’s recommended that you employ latex paint as it offers better flexibility and chalk resistance. You may also want to consider using a paint protection film to help protect your newly repainted surfaces.
If your existing stuccos have visible cracks or holes, but don’t need a full-blown repair job, try to patch up those holes first. Patch up the holes with a siding contractor grade patching compound, and then fill in the cracks with mortar. Apply a layer of topcoat, let it dry, and then apply another layer of topcoat. Don’t forget to apply two layers of exterior siding patch to help seal and repair any weak areas. Then, paint the repaired portion of your wall.
If your damaged studios are located inside the home, they will either need to be repaired with metal lath, or patched up with plywood. First, determine where the damage is located and clean out all loose debris and soil. Using a heavy-duty shop vac, remove and dispose of all loose materials found in the damaged area. Now, apply a layer of repairing compound on the surface, apply two layers of metal lath, and then apply one more layer of metal lath over the top to finish the repair.
If you’re wondering how to repair stucco with nails, it’s best to start at the bottom – the part where the damage is located. Remove any loose stuccos from around the house using an open-end commercial ladder. If the damaged stuccos are inside your home, you will probably need to use a specific tool known as a “hydraulic nail gun.” This is basically a tool that looks like a huge nail gun and shoots out nails at high speed. Use the Hydraulic nail gun to hammer in the damaged stucco, repairing cracks and nicks, and smoothing out any uneven areas. For larger repairs, use both the hammer and the nail.
Now that the studios are repaired, you need to prepare the surface underneath for the next step. This might seem obvious, but you’d be surprised how many people overlook this safety tip. When you’re trying to repair stucco, especially larger ones, it’s important to remember that these walls are also going to become moist, even during dry weather. To protect your skin and prevent any accidents, wear thick work gloves and a face mask at all times when handling the task, especially if there are large pieces of broken stuccos. Also, use steel wool or sandpaper when scrubbing or scraping the damaged area to prevent your hands from becoming scratched up.
After you’ve completed the repair, take note of any loose or damaged parts, and clean them according to the directions on the bottle. If the studios are already wet, simply mix some water into the mix and apply it to the area. Once the water has completely dried, simply mix in some premixed stuccoing repair mix, as well as some oil-based joint compound. Then apply the mixture to the affected areas, being careful to smooth out any bubbles that form. Wait for the glue to dry before you apply the final layer of repair, ensuring that all traces of water have been removed.
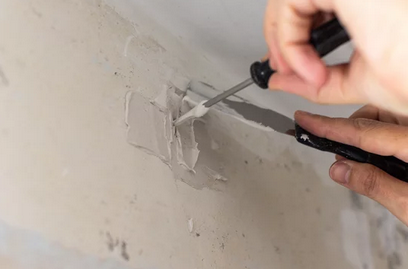
If you’re wondering how to repair stucco that has cracks, the answer is to first get the area sprayed with some anti-rust primer before working on it. If the damage is severe, or there are large holes or gaps, you can pour a couple of gallons of epoxy or bonding agent into the affected area to fill and protect the cracks. This will help seal up the cracks and protect them from future damage. You can then use some wood filler and sandpaper to fill in any gaps and smooth out any corners, and you’ll have yourself a brand new looking home.